Welcome to our comprehensive guide on how to make a dog cone collar at home. When your beloved furry friend needs to wear a cone collar to aid in their recovery or protect them from certain behaviors, it’s essential to ensure their comfort and well-being.
While you can easily purchase pre-made cone collars, why not embark on a rewarding DIY project? By crafting a dog cone collar yourself, you can tailor it specifically to your pet’s needs and make it a more pleasant experience for them.
In this article, we will provide you with step-by-step instructions, tips, and insights on creating a homemade dog cone collar that will keep your furry companion comfortable and on the road to recovery. So, let’s dive in and learn how to make a dog cone collar at home with ease and creativity!
Table of Contents
DIY Dog Cone Collar at Home
If your dog has an injury or surgery, you may need to prevent them from licking or scratching the affected area. A cone collar, also known as an Elizabethan collar or E-collar, can help with that. However, some dogs may find the cone collar uncomfortable, scary, or annoying.
You may also not have a cone collar handy when you need one. In that case, you can try making a dog cone collar at home with some common household items. Here are some ideas for DIY dog cone collars that are easy and cheap to make.
Paper Dog Cone Collar
One of the simplest ways to make a dog cone collar is to use paper. You can use any kind of paper, such as newspaper, poster board, or cardboard. The paper should be large enough to wrap around your dog’s neck and extend beyond their nose.
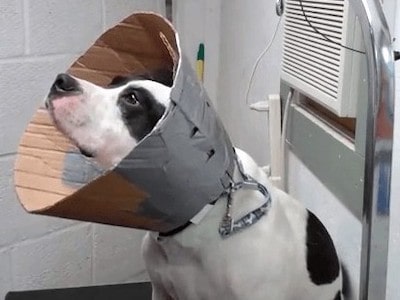
To make a paper dog cone collar, follow these steps:
- Cut a large semicircle from the paper. The diameter of the semicircle should be equal to the length from your dog’s neck to their nose, plus a few inches for overlap.
- Roll the paper into a cone shape and tape the edges together. Make sure the cone is not too tight or too loose around your dog’s neck. You can adjust the size by cutting off some of the paper or adding more.
- Cut off the excess paper at the tip of the cone. The cone should cover your dog’s mouth and eyes, but not block their vision or breathing.
- Punch holes along the base of the cone and thread a ribbon or string through them. Tie the ribbon or string around your dog’s neck to secure the cone. You can also use velcro or elastic instead of ribbon or string.
Cloth Dog Cone Collar
Another option for making a dog cone collar is to use cloth. You can use any kind of fabric, such as an old T-shirt, towel, or pillowcase. The fabric should be soft and flexible, but not too stretchy or flimsy.
To make a cloth dog cone collar, follow these steps:
- Cut a large circle from the fabric. The diameter of the circle should be equal to the length from your dog’s neck to their nose, plus a few inches for seam allowance.
- Fold the circle in half and sew along the curved edge, leaving a small opening at the tip. Turn the fabric inside out through the opening and stuff it with cotton batting or polyester filling. You can also use crumpled paper or plastic bags as stuffing.
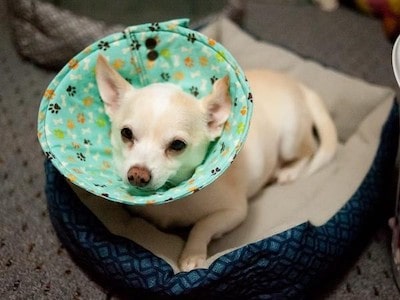
- Sew the opening closed and flatten the stuffed fabric into a cone shape. Make sure the cone is not too tight or too loose around your dog’s neck. You can adjust the size by adding or removing some of the stuffing.
- Sew velcro strips along the base of the cone and attach them around your dog’s neck to secure the cone. You can also use snaps or buttons instead of velcro.
Pool Noodle Dog Cone Collar
A pool noodle is a foam tube that is used for swimming and water games. You can also use it to make a dog cone collar that is soft and lightweight. You will need a pool noodle that is thick enough to fit around your dog’s neck and long enough to extend beyond their nose.
To make a pool noodle dog cone collar, follow these steps:
- Cut a piece of pool noodle that is equal to the length from your dog’s neck to their nose, plus a few inches for overlap.
- Cut a slit along one side of the pool noodle and insert your dog’s collar through it. The pool noodle should slide over your dog’s collar and rest on their shoulders.
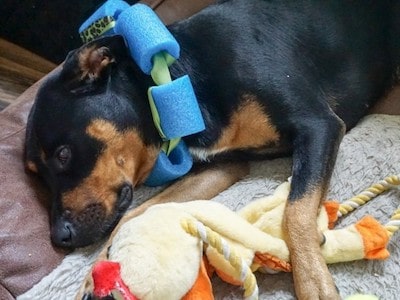
- Bend the pool noodle into a cone shape and tape or glue the ends together. Make sure the cone is not too tight or too loose around your dog’s neck. You can adjust the size by cutting off some of the pool noodle or adding more.
- Cut off any excess foam at the tip of the cone. The cone should cover your dog’s mouth and eyes, but not block their vision or breathing.
A bucket is a plastic container that is used for storing and carrying liquids. You can also use it to make a dog cone collar that is sturdy and durable. You will need a bucket that is wide enough to fit around your dog’s neck and deep enough to extend beyond their nose.
Bucket Collar
To make a bucket collar, follow these steps:
- Cut off the bottom of the bucket with a sharp knife or scissors. Be careful not to cut yourself or leave any sharp edges on the bucket.
- Cut out a hole in the center of the bucket that is large enough for your dog’s head to fit through. You can use a compass or a plate as a guide for tracing the hole.
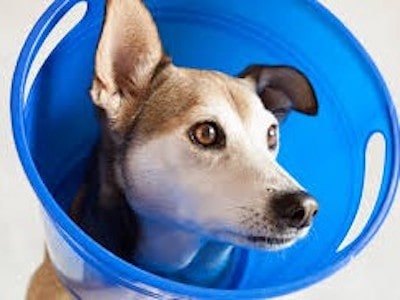
- Sand down any rough edges on the bucket with sandpaper or a file. You can also cover the edges with duct tape or foam padding to make them smoother and softer.
- Put the bucket over your dog’s head and adjust it to fit snugly around their neck. You can use velcro strips or elastic bands to secure the bucket in place. You can also cut out some notches or holes in the bucket to allow for air circulation and ear movement.
Neck Pillow Collar
A neck pillow is a U-shaped pillow that is used for supporting the neck and head while traveling or sleeping. You can also use it to make a dog cone collar that is comfortable and cozy. You will need a neck pillow that is large enough to wrap around your dog’s neck and prevent them from reaching their wound.
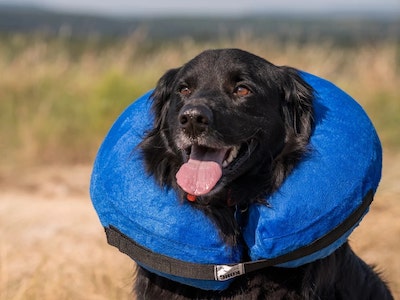
To make a neck pillow collar, follow these steps:
- Put the neck pillow around your dog’s neck and fasten it with the attached strap or button. Make sure the pillow is not too tight or too loose around your dog’s neck. You can adjust the size by adding or removing some of the filling.
- If the pillow is too short or too long, you can cut off some of the fabric or sew on some extra fabric to make it fit better. You can also use a larger or smaller pillow depending on your dog’s size.
- If the pillow is too soft or too hard, you can add or remove some of the filling to make it more comfortable for your dog. You can also use a different type of filling, such as rice, beans, or foam beads.
FAQs
Why would my dog need to wear a cone collar?
A dog cone collar, also known as an Elizabethan collar or E-collar, is often recommended by veterinarians to prevent dogs from licking or biting at surgical incisions, wounds, or hotspots. It helps protect the affected area and promotes faster healing.
Can I wash the homemade cone collar?
In most cases, yes. Check the specific materials you used for the collar and refer to the washing instructions for those materials. Using gentle cleaning methods, such as hand-washing or spot-cleaning, will help maintain the collar’s integrity.
What if my dog keeps trying to remove the cone collar?
Some dogs may initially find wearing a cone collar uncomfortable or strange. If your dog continues to try to remove it, consult your veterinarian for advice. They may recommend alternative collar options or behavioral techniques to help your dog adjust and prevent them from removing the collar.
Can I reuse the homemade dog cone collar?
Depending on the materials used and the condition of the collar, you may be able to reuse it for future needs. Ensure that the collar is clean, free from damage, and fits your dog properly before reusing it. Check for any signs of wear and tear that may compromise its effectiveness.
Conclusion
In conclusion, learning how to make a dog cone collar at home can be a rewarding and practical endeavor for pet parents. By following the step-by-step instructions, gathering the necessary materials, and considering your dog’s comfort, you can create a homemade cone collar that promotes their healing process while ensuring their well-being.
Crafting a custom cone collar allows you to tailor it specifically to your dog’s size, shape, and individual needs. You can use softer materials, add padding for extra comfort, and even decorate it to give it a personal touch. This DIY approach not only saves you money but also allows you to be actively involved in your pet’s recovery journey.
Remember to take accurate measurements, introduce the collar gradually, and monitor your dog’s behavior for any signs of discomfort or resistance. If your dog continues to struggle with the cone collar, consult your veterinarian for guidance and alternative options that may better suit their needs.


